- In the Windows start menu, type Internet Information Services (IIS) Manager and open it.
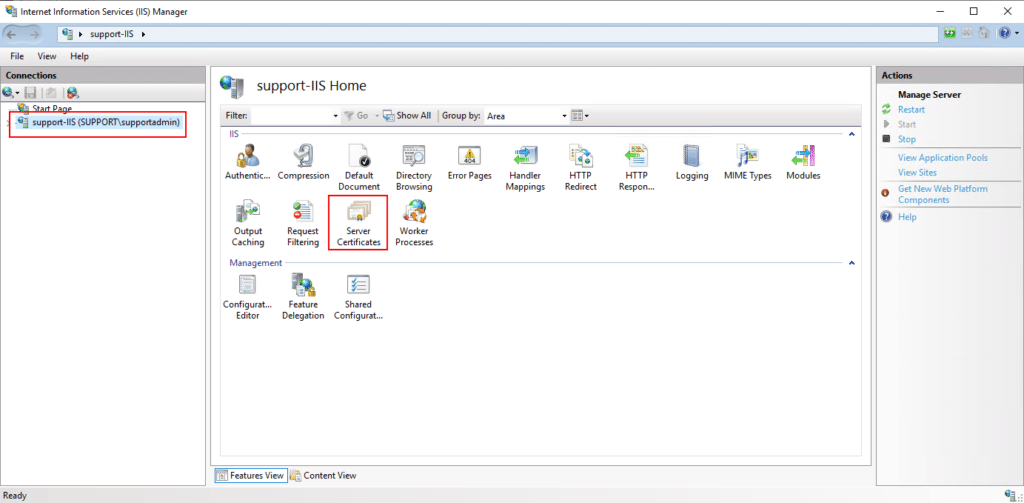
- In Internet Information Services (IIS) Manager, in the Connections menu tree (left pane), locate and click the server name:
-
On the server name Home page (center pane), double-click Server Certificate in the IIS section.
-
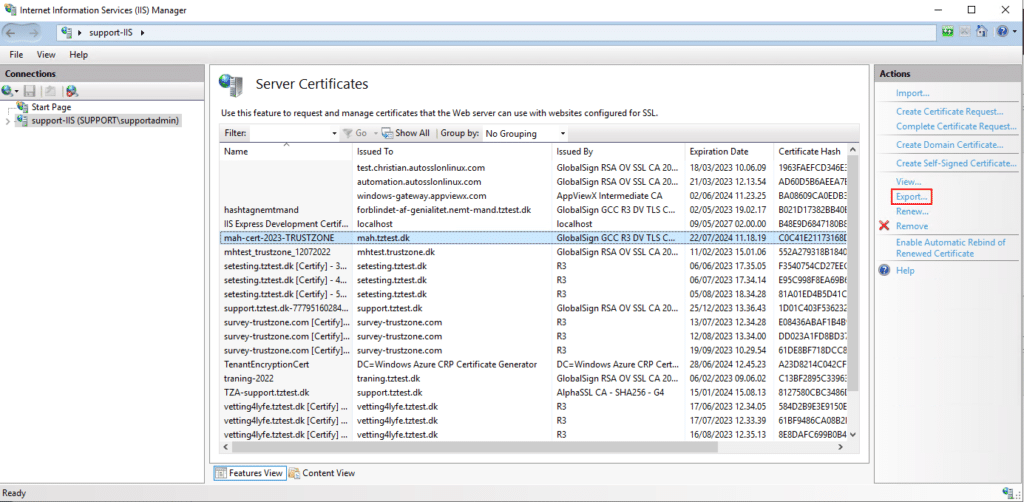
On the Server Certificates page (center pane), select the desired certificate.
- In the Actions menu (right pane), click the “Export…” button:
6. On the File Name page, under Specify a file name for the PFX, click the … box to browse to a location where you want to save your .pfx.
7. Now, enter a password and confirm it.
8. Click “OK,” and the .pfx file will be created and located at the selected file path.